Send Email from Shopify Flow with Custom SMTP Configuration
Overview
Flow Action Extensions lets you send transactional emails from Shopify Flow through your own SMTP server. In this example, a customer receives a VIP tag, Shopify Flow runs, and the workflow sends a branded email using your saved SMTP configuration and email template.
This setup has three parts:
Create an SMTP connection in SMTP Configs
Design the email in Email Templates
Use the app’s email action in Shopify Flow and pass customer data into the template
Before you begin
Install Flow Action Extensions in your Shopify store
Make sure your SMTP provider gives you the server host, port, username, and password
Confirm the sender email address you want to use for VIP emails
Scenario: send a VIP welcome email
In this scenario, your workflow does the following:
A customer is tagged with
VIPShopify Flow starts the workflow
The workflow runs the app’s Send Transactional Email action
The action uses your saved SMTP configuration
The action sends your saved email template with dynamic customer details
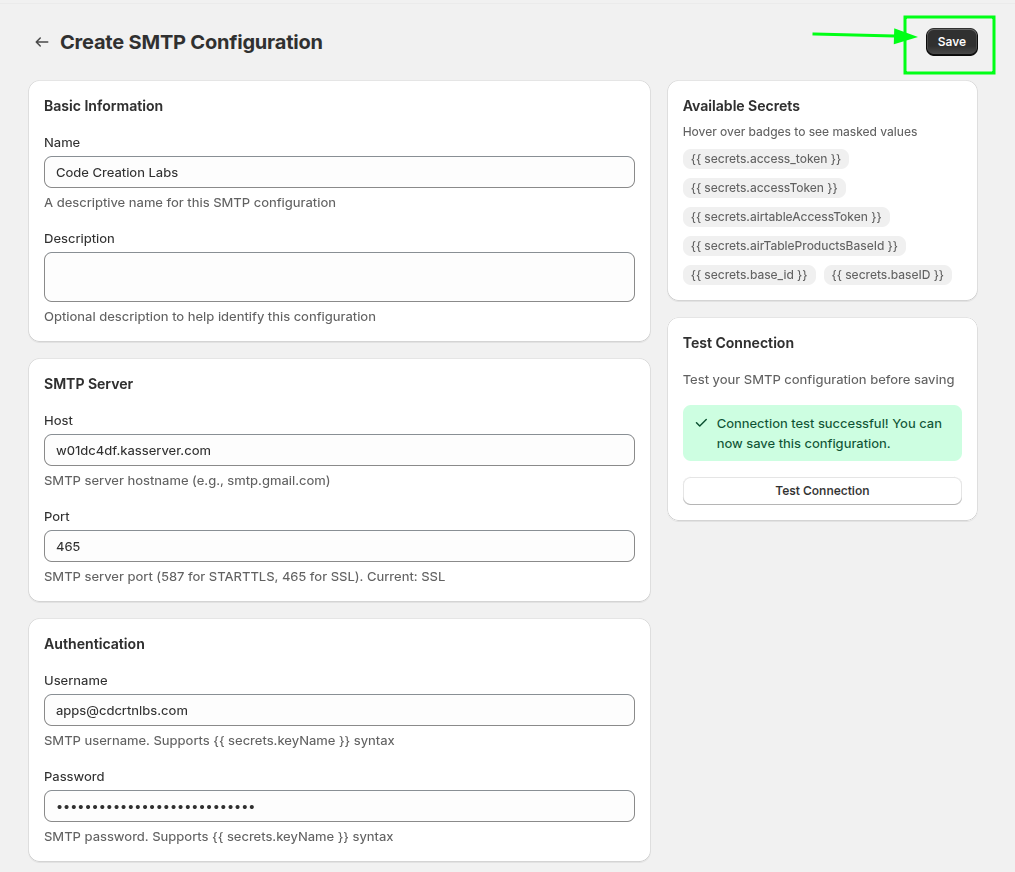
Step 1: Configure your SMTP server
In Flow Action Extensions, go to SMTP Configs. This is where you store the mail server that will send your transactional emails.
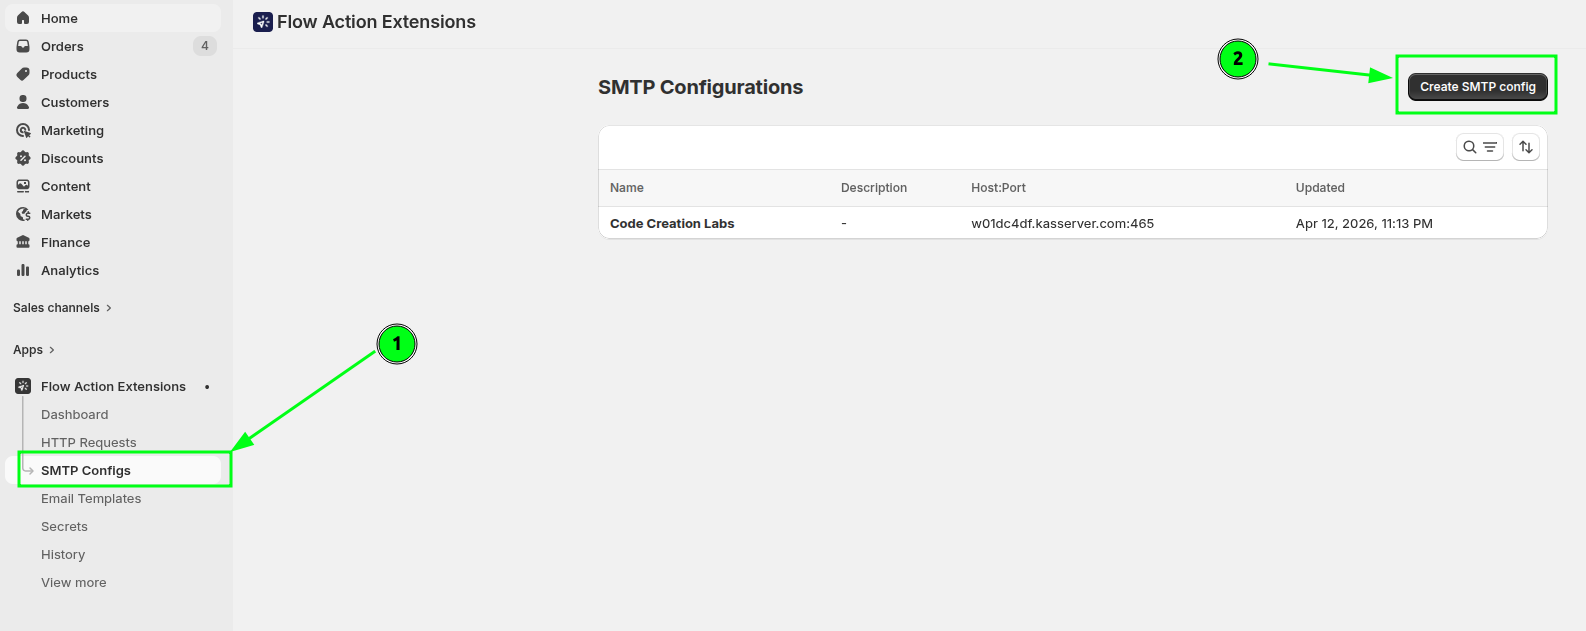
Enter the SMTP host, port, username, and password from your email provider. Then press Test Connection button.
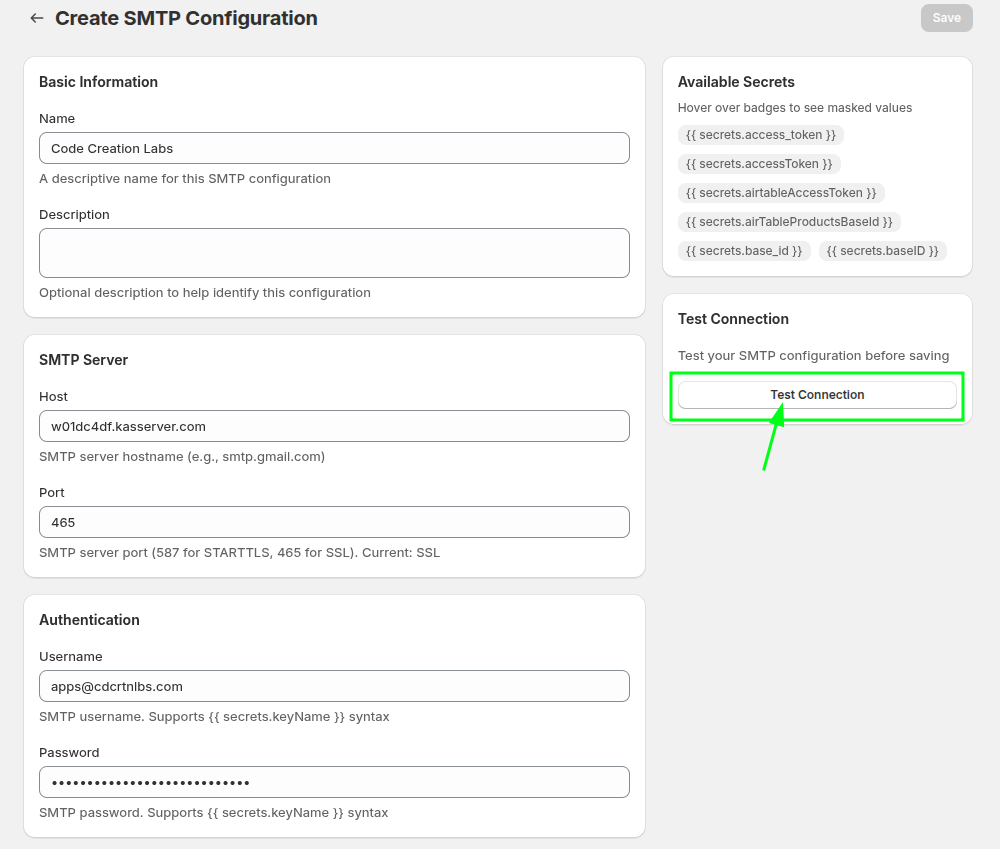
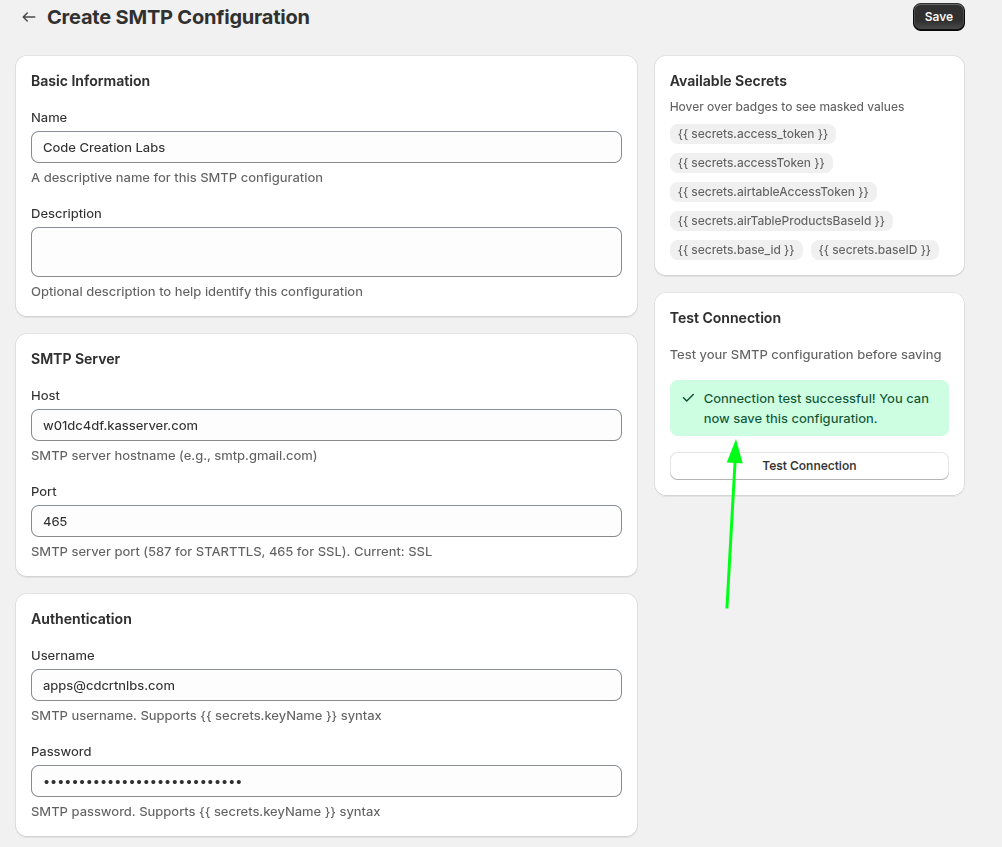
If the connection is good, you will see the success message like this
Choose the email address the message should come from. If needed, also set a branded display name so recipients see your store name instead of only a raw email address.
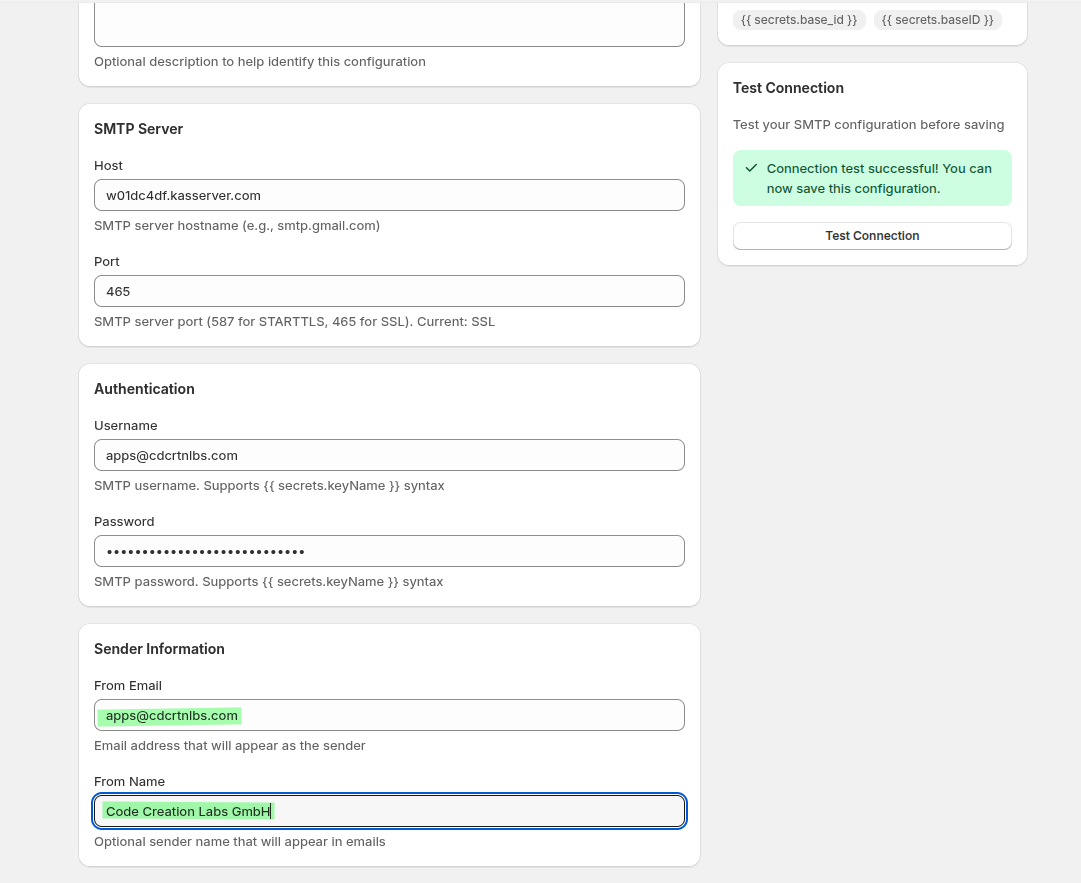
Save the SMTP configuration so it can be selected later by your email template and Shopify Flow action.
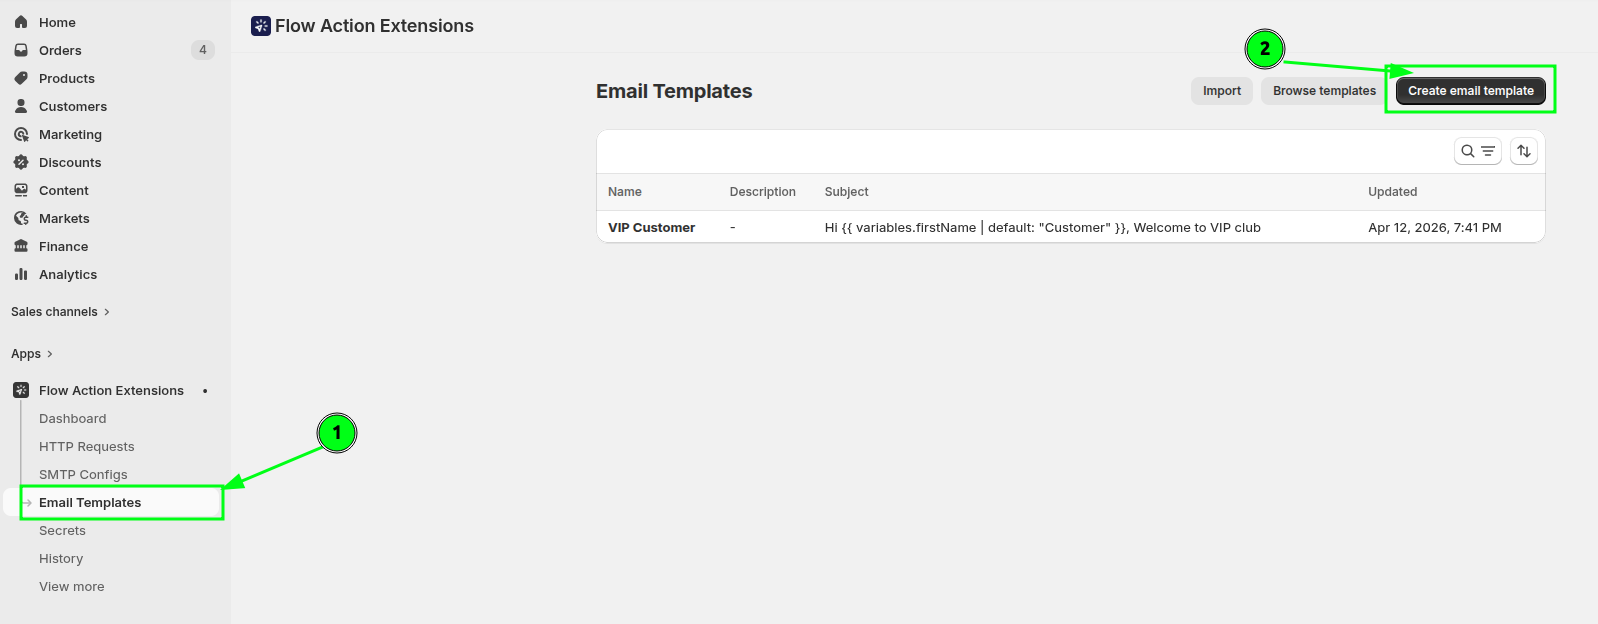
Step 2: Design the email in Email Templates
Go to Email Templates in the app. This is where you create the email content that Shopify Flow will send.
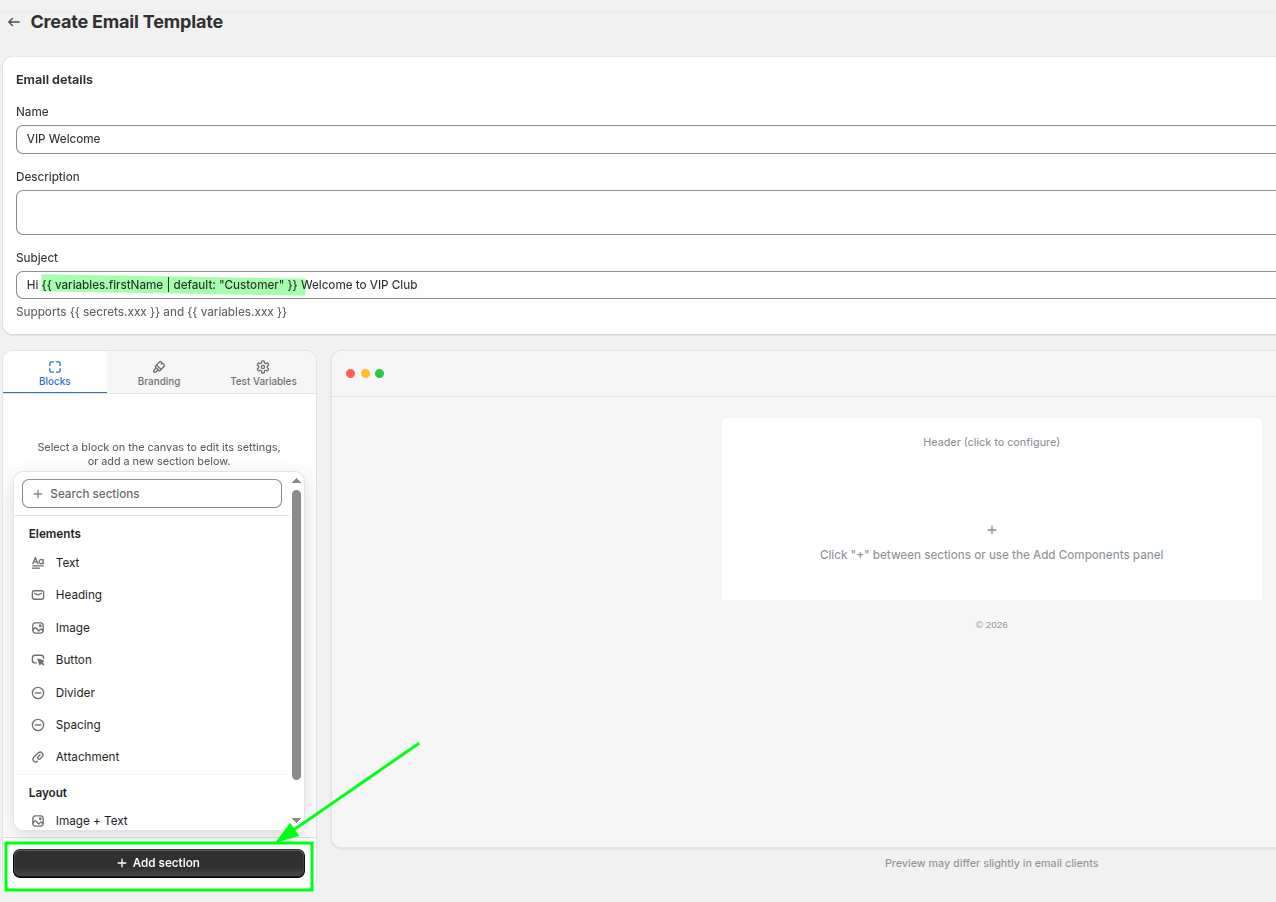
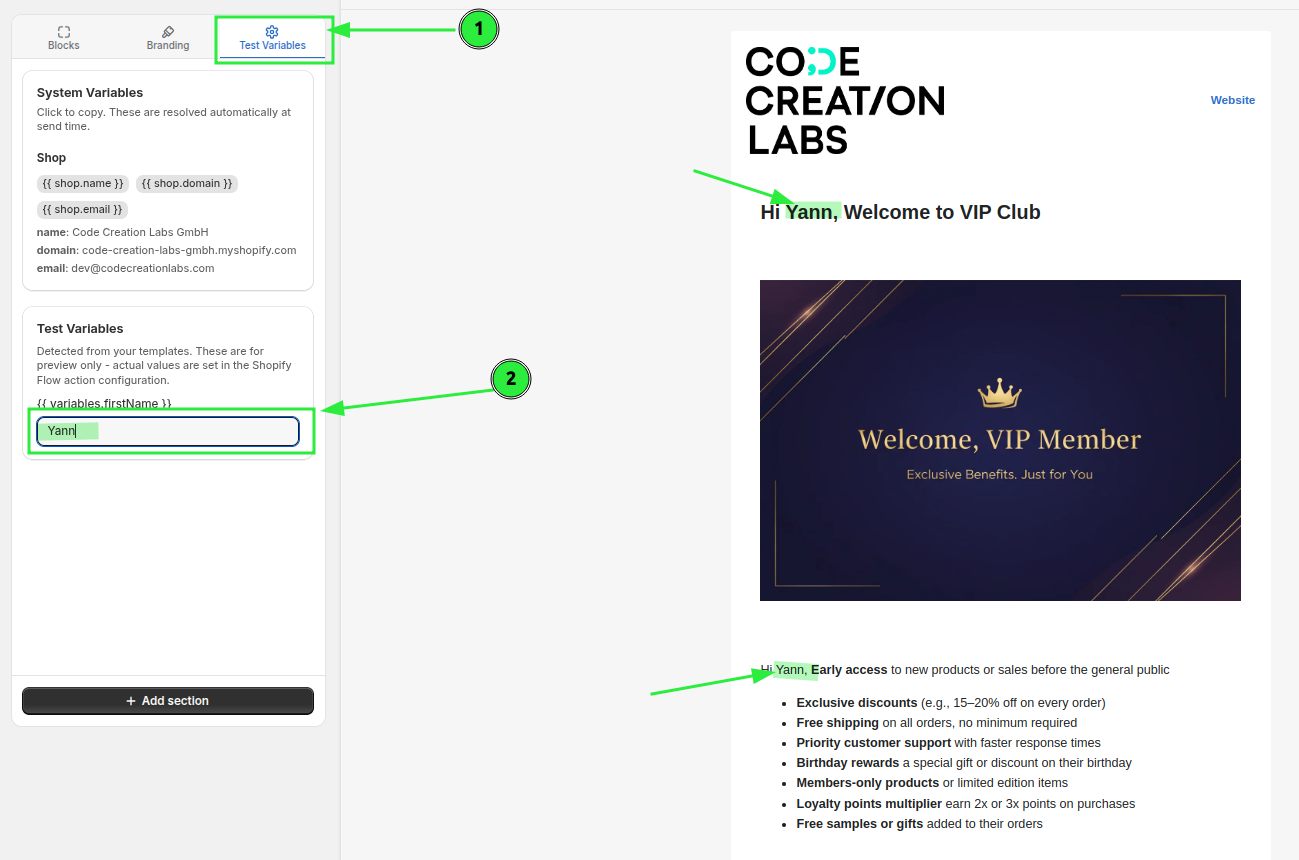
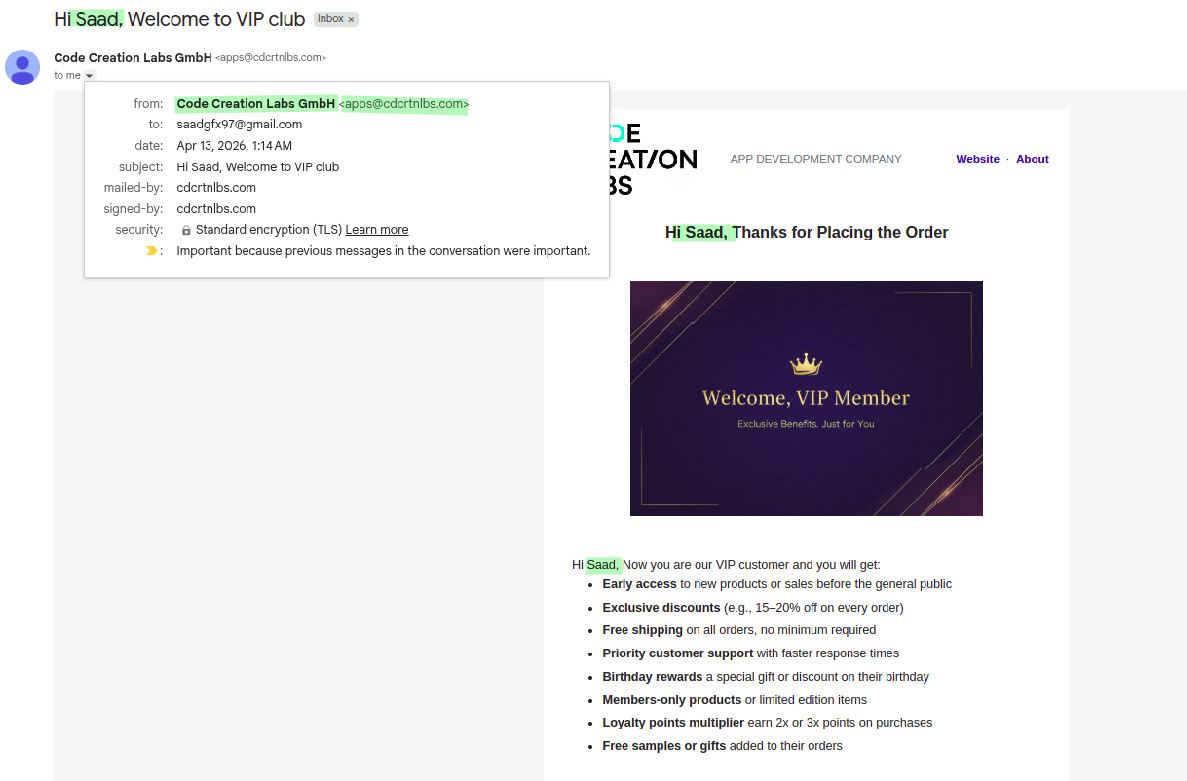
Create a template for your VIP scenario. Add a subject line and the message body. In the subject, you can use the variables that will be passed form the Shopify flow. I have used firstName variable and by default used "Customer" using the default liquid filter.
my Subject looks like this: Hi {{ variables.firstName | default: "Customer" }} Welcome to VIP Club
You can select sections to create the email design that fits to your brand identity.
I have used Heading Section, Image Section and Text section to design this template. In the text section you can see, I have used the variable firstName, this variable will be passed from teh Shopify flow.
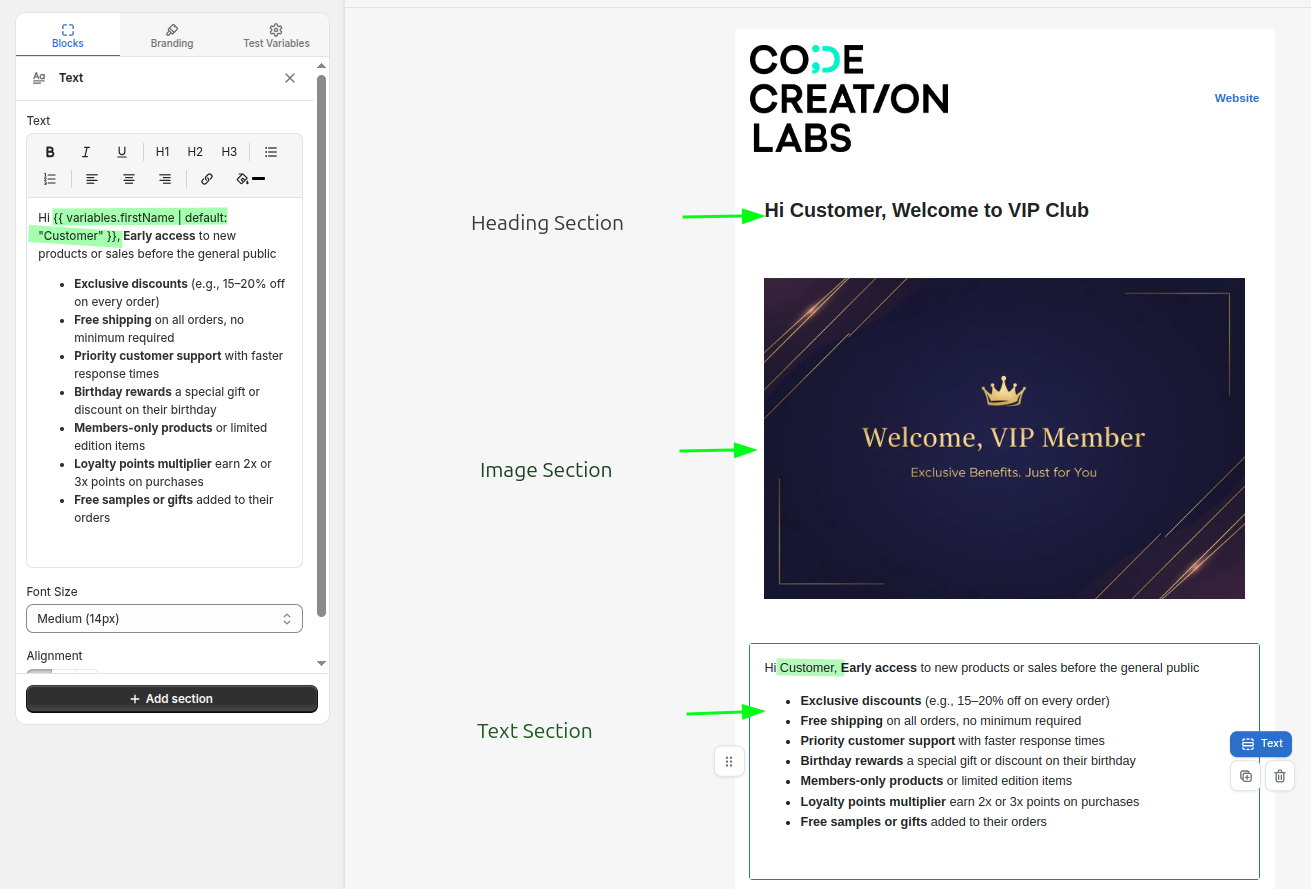
In the Test Variables section, you can pass the variables to test the data and design.
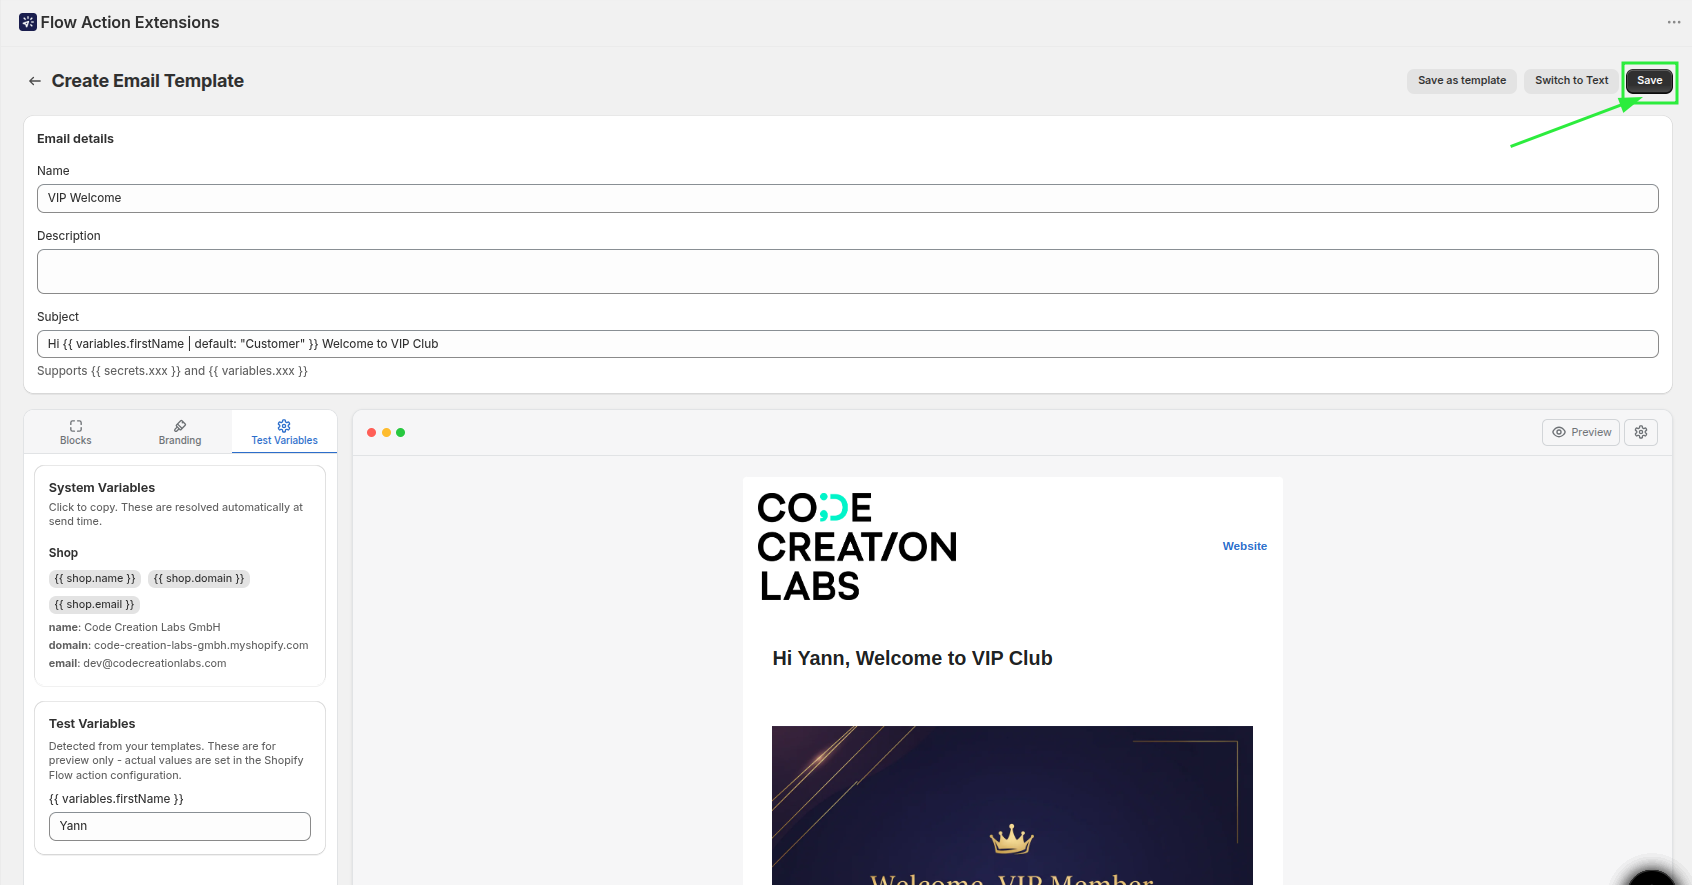
Save the template so it can be selected inside the Shopify Flow action.
Step 3: Build the workflow in Shopify Flow
Open Shopify Flow and create a workflow for your VIP customer process.
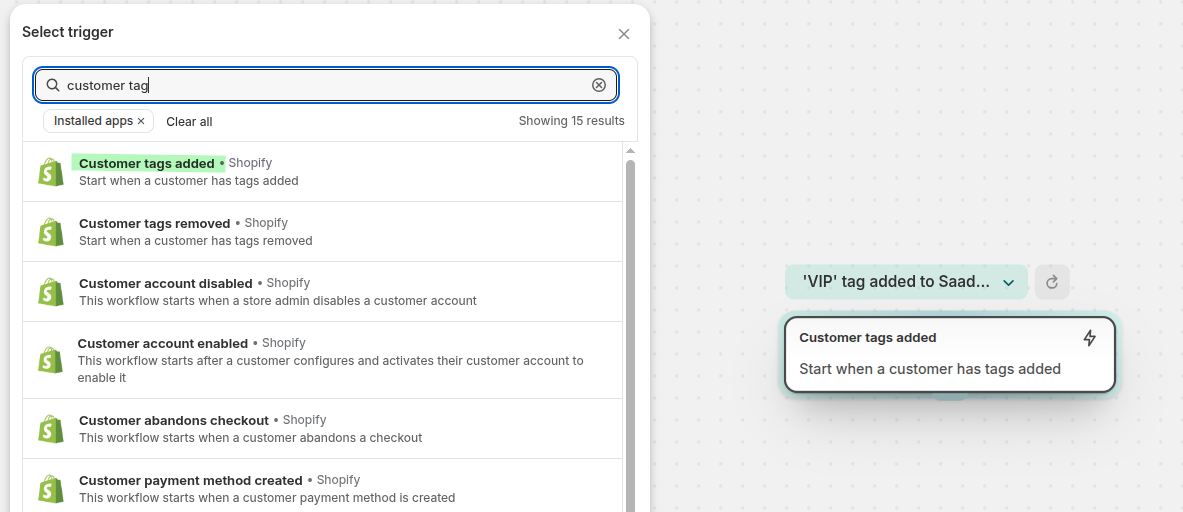
Use the customer tagging event that fits your process. The goal is to run the workflow when a customer gets the VIP tag.
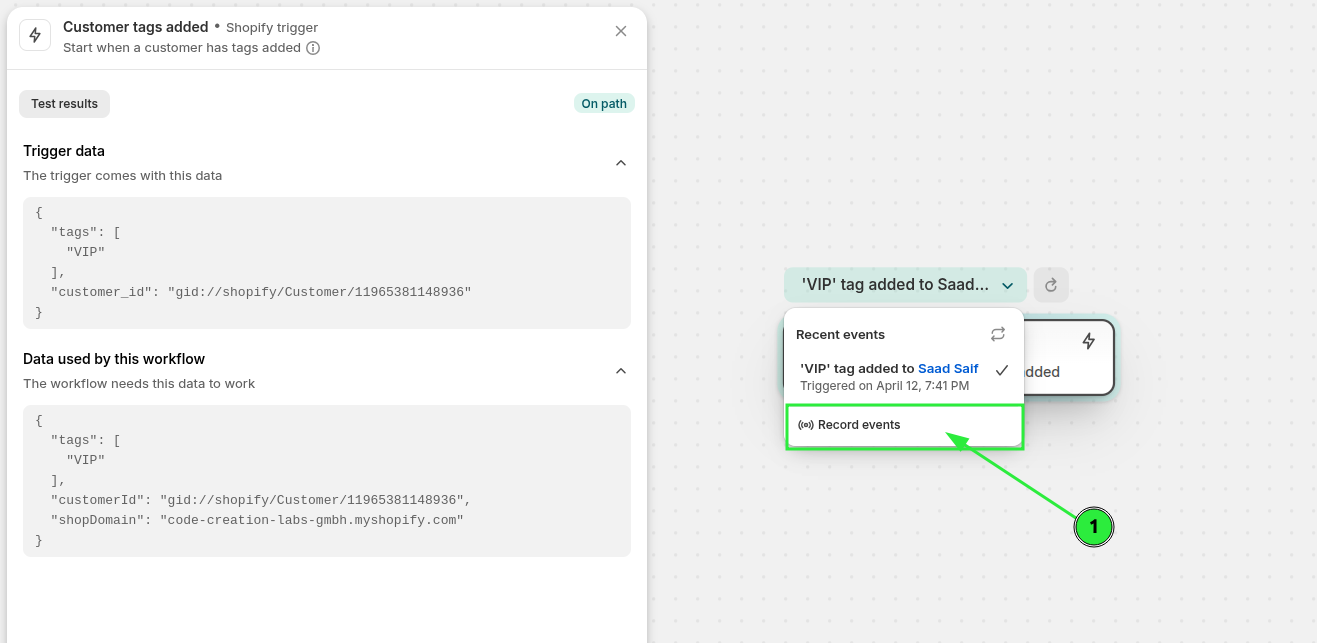
Now press Rocord events button and in the new tab add the tag to the customer and you will see the trigger data after selecting the trigger in left side.
Add the app action labeled Send Transactional Email in Shopify Flow. This is the Flow Action Extensions email-sending action that connects your workflow to the template and SMTP setup you created in the app. In to Email, use the customer email. And then press configure email.
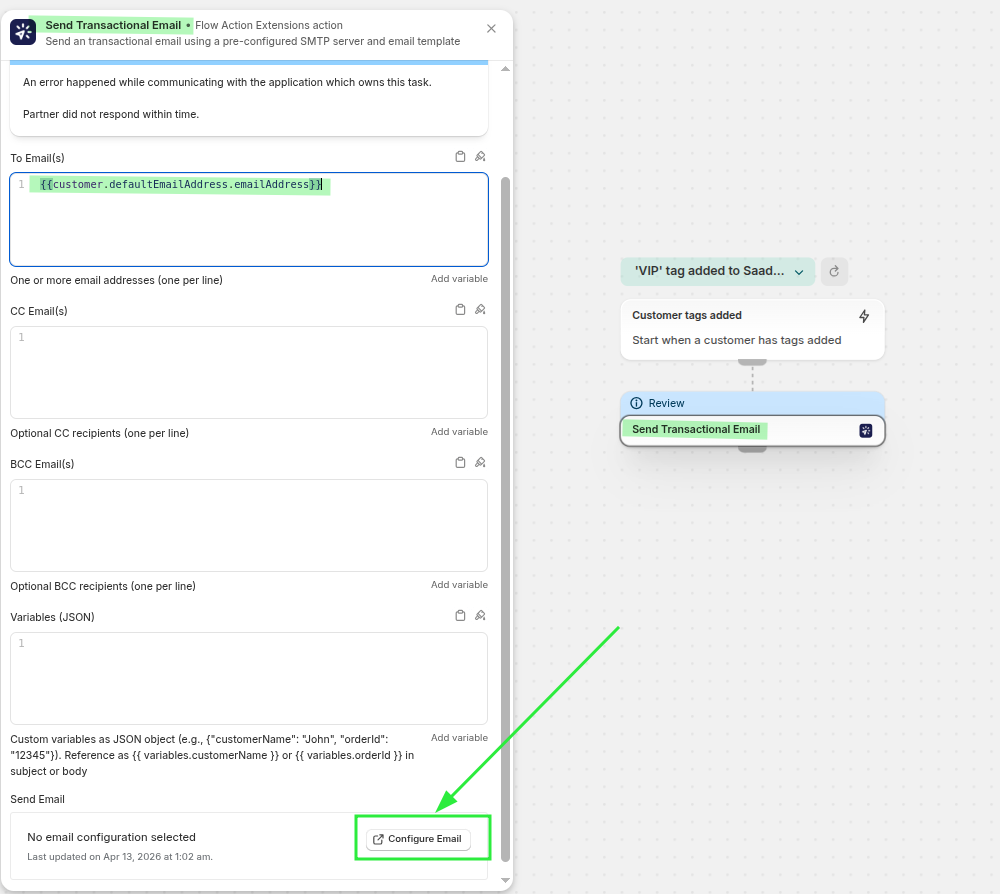
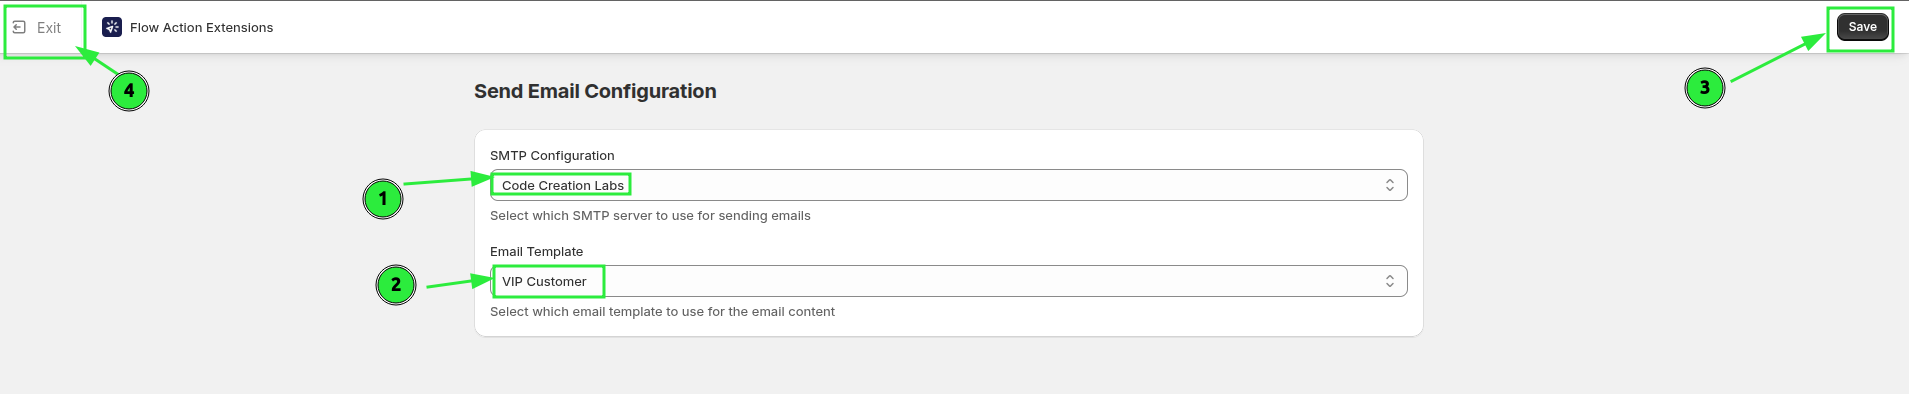
In the action settings, choose the email template you created in Email Templates and the SMTP Configuration for this email. Then hit save and go back to the flow.
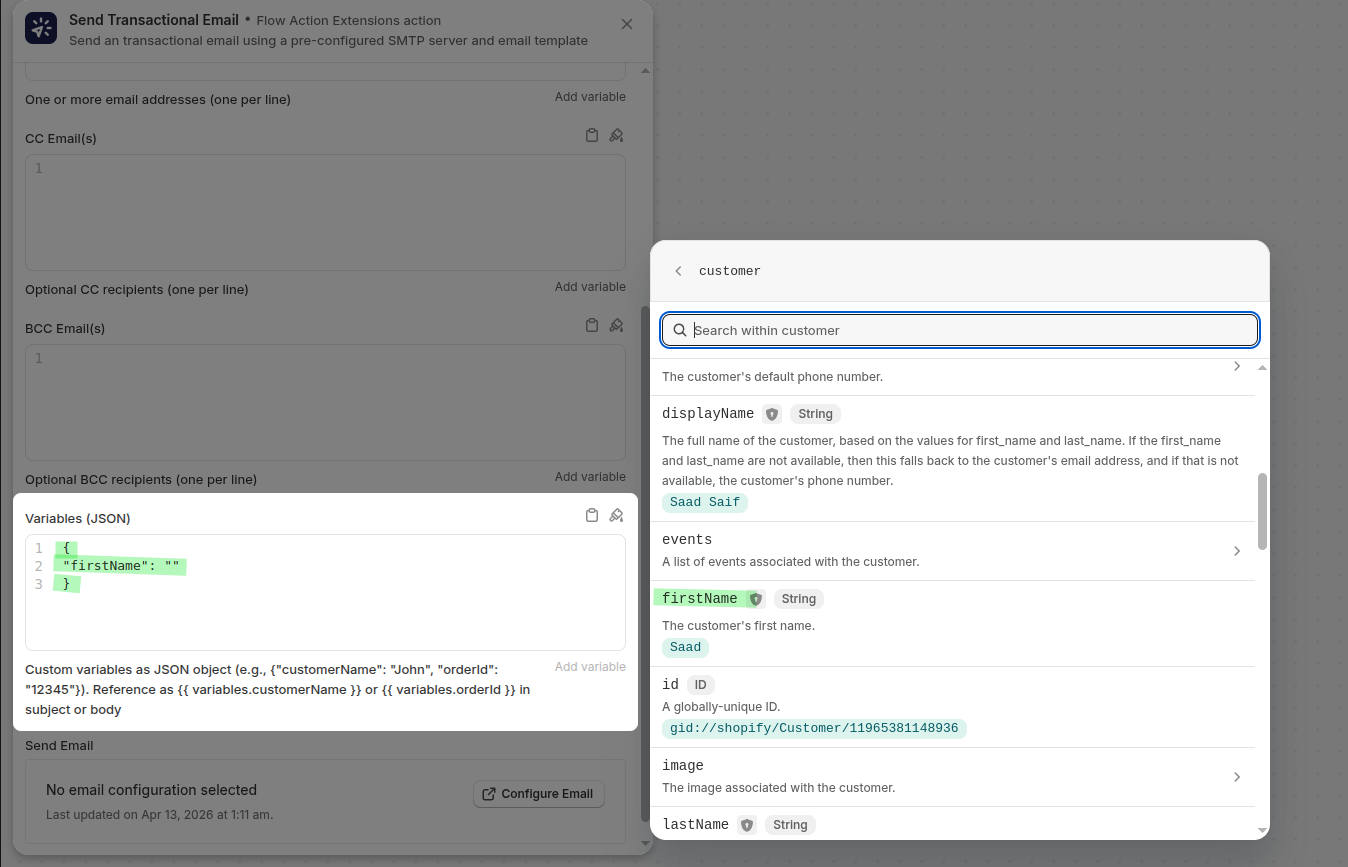
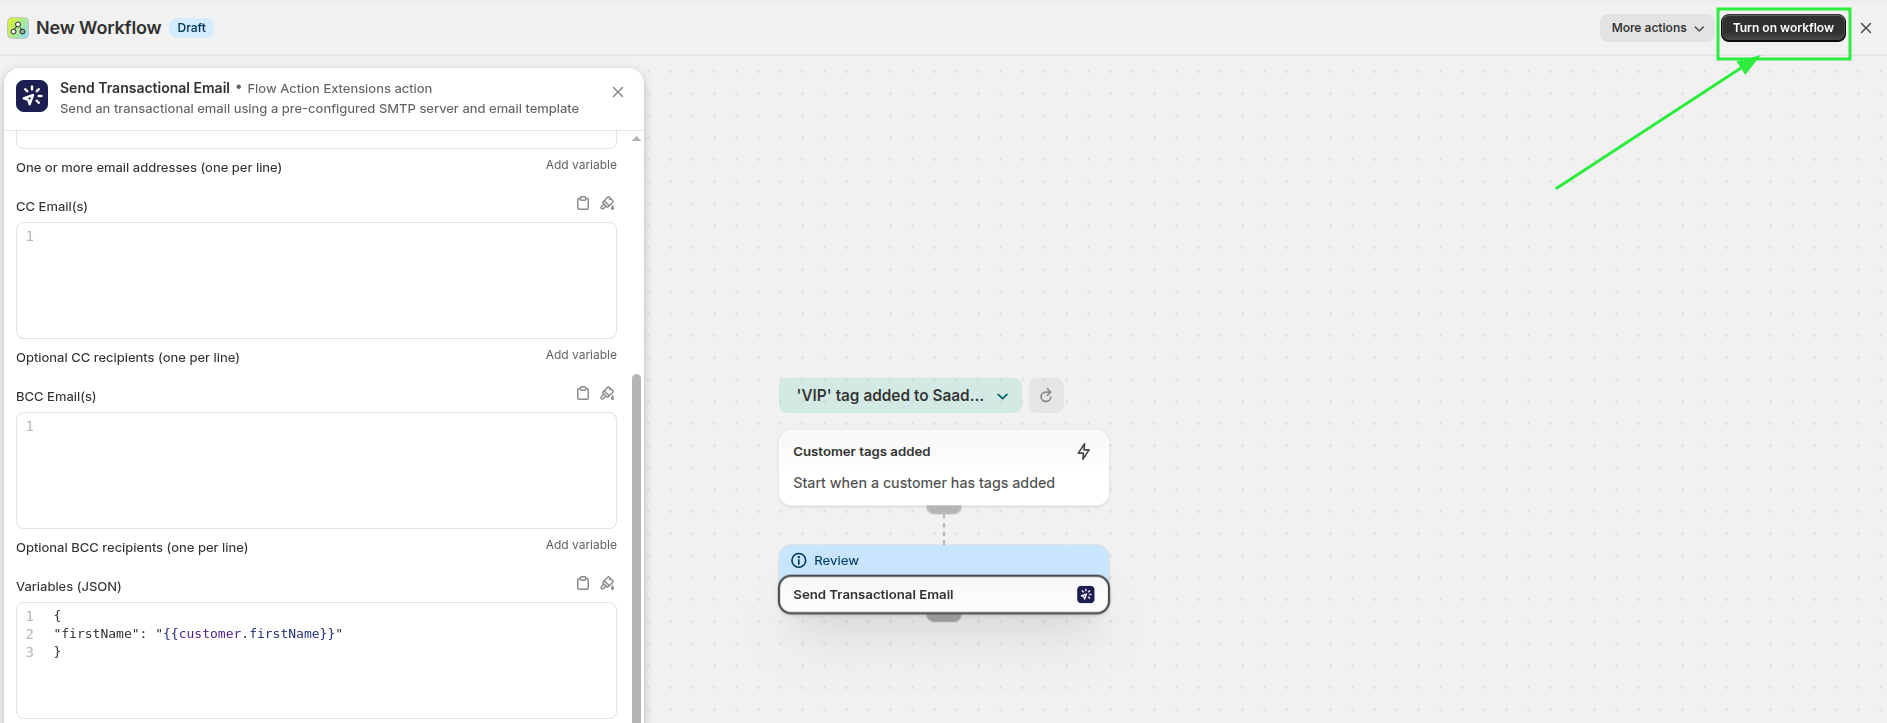
Pass the customer data your template needs. A simple example looks like this:
{
  "firstName": "{{ customer.firstName }}"
}
Turn on the workflow after you confirm the trigger, condition, template, and variables are all correct.
How the pieces work together
When the customer gets the VIP tag, Shopify Flow runs the workflow and calls the app’s email action. That action uses:
Your saved server settings from SMTP Configs
Your saved design from Email Templates
The customer values passed in from the Flow step as JSON variables
This approach keeps the email design reusable and makes it easy to send the same template for different customers without editing the HTML every time.
Test the VIP email flow
Before using this in a live store, run a full test:
Apply the
VIPtag to a test customerConfirm the workflow runs in Shopify Flow
Check that the customer receives the email
Verify the subject line and HTML content display correctly
Make sure the sender name and sender email match your brand
If the message does not arrive, open Event History in Flow Action Extensions to review the execution result.
The email looks like this for me, with the SMTP configuration and the email design that we used in this flow:
See the app’s core features, including HTTP requests, SMTP email sending, secrets, and Event History.
Learn how to connect Shopify Flow to external APIs and services with the app’s HTTP Request action.